Valentines Treats Chocolate Covered Oreos
Highlighted under: Simple Food
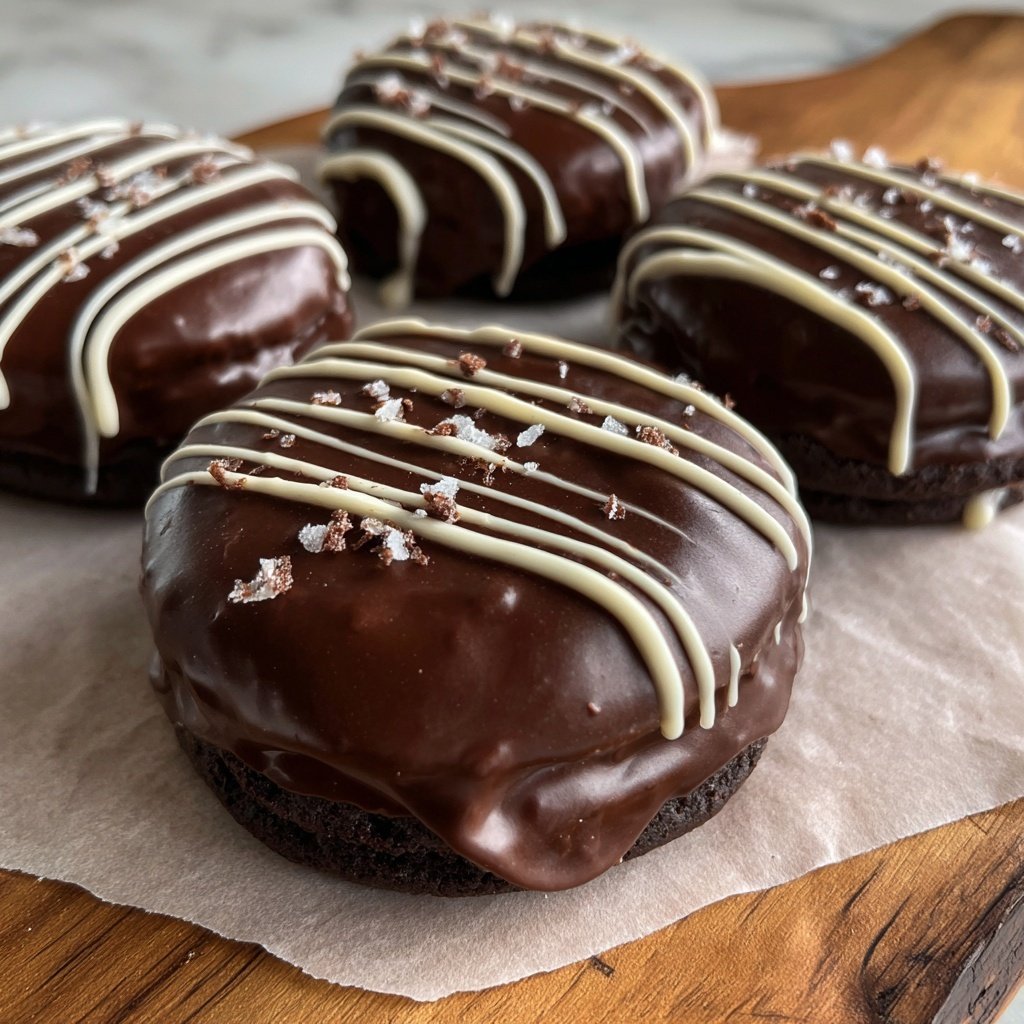
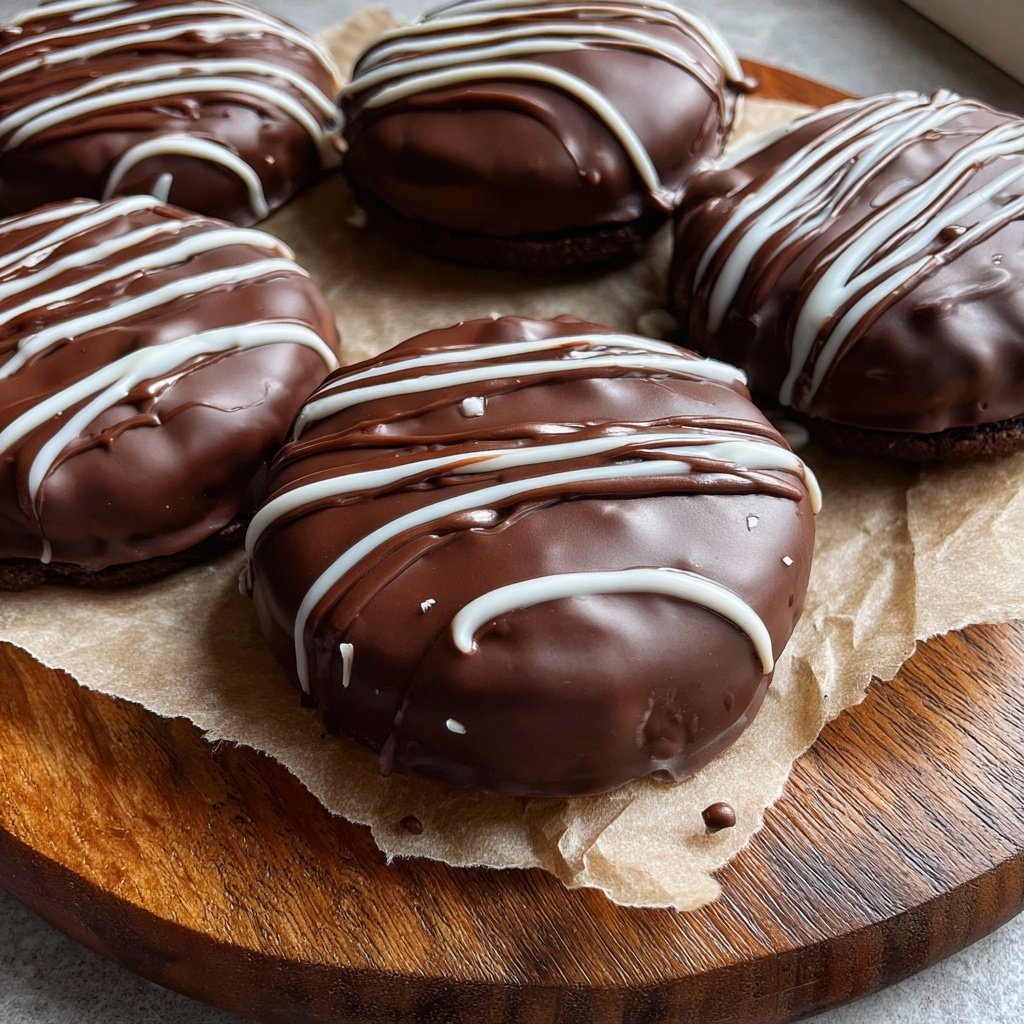
I absolutely love making these Valentine’s Treats Chocolate Covered Oreos! Each bite is a delightful combination of creamy filling and a rich chocolate coating that feels indulgent yet simple to prepare. These treats are perfect for sharing with loved ones on Valentine’s Day or simply when you want to add a bit of sweetness to your day. The best part is how easily they come together, making them a go-to dessert for unexpected gatherings or sweet cravings. Trust me, everyone will be asking for more!
When I first tried making chocolate covered Oreos, I was thrilled at how easy they were to whip up. I learned that using high-quality chocolate for coating significantly enhances the flavor, giving the Oreos a gourmet touch. Melt the chocolate slowly to avoid burning it – this simple tip can make all the difference!
Every Valentine’s Day, I experiment with different toppings, from colorful sprinkles to crushed nuts. It’s a fun way to customize the treats and make each batch unique. Plus, these handmade gifts from the heart always earn smiles from friends and family!
Why You'll Love These Treats
- Rich chocolate coating that oozes love
- Easy to make and customize for any occasion
- Perfectly crunchy and creamy with every bite
The Magic of Melting Chocolate
When melting chocolate for your Oreos, timing is crucial. Use the microwave in 30-second intervals to prevent overheating, as this can cause the chocolate to seize. Stir between each interval until you achieve a smooth and glossy consistency. If you've added coconut oil, it will give the chocolate a shiny finish and help it flow more easily over the cookies. This extra step is especially useful if you plan to dip multiple Oreos, as it ensures an even coating.
Alternatively, if you prefer using a double boiler, set it on low heat to maintain a gentle temperature. Be cautious of water splashing into the chocolate, as this can also lead to seizing. Once melted, keep the chocolate warm by placing the bowl in a slightly larger bowl filled with warm water. This method allows for more control over the melting process and can result in a smoother finish.
Customizing Your Oreos
The beauty of these chocolate-covered Oreos lies in their versatility. You can switch up the toppings to suit any occasion, from festive sprinkles for parties to crushed nuts for a more sophisticated treat. If you’re a fan of flavors, consider adding a sprinkle of sea salt over the chocolate before it sets. This will enhance the sweetness of the chocolate and create a delightful contrast with the oreo's cream filling.
Moreover, you can customize the chocolate too. Swap semi-sweet chocolate chips for milk chocolate or white chocolate, depending on your preference. If you're looking for a more decadent taste, try using dark chocolate with a higher cocoa content. Just be mindful that darker chocolates may set faster, so work quickly when dipping your Oreos. This flexibility ensures that you can tailor these treats to match any sweet tooth.
Storing Your Chocolate-Covered Oreos
After your treats are fully set, it’s important to store them properly to maintain their freshness. Place the chocolate-covered Oreos in an airtight container, separating layers with parchment paper to prevent them from sticking together. At room temperature, they can last up to a week, but if you want to keep them longer, consider refrigerating them. Just note that refrigeration can affect the texture slightly; they may become a bit firmer.
If you find yourself making a large batch, these treats can also be frozen. Wrap each Oreo individually in plastic wrap, and then place them in a freezer-safe container. When you’re ready to enjoy, simply let them thaw in the fridge for a couple of hours. This method ensures that you always have a delicious treat on hand, no matter the occasion!
Ingredients
Gather everything you need to make these delicious treats!
Ingredients
- 12 Oreo cookies
- 1 cup semi-sweet chocolate chips
- 1 tablespoon coconut oil (optional)
- Sprinkles or crushed nuts for topping (optional)
Now that you have all your ingredients, let’s get started!
Instructions
Follow these simple steps to create beautiful chocolate-covered Oreos!
Melt the Chocolate
In a microwave-safe bowl, combine the semi-sweet chocolate chips with coconut oil. Microwave in 30-second intervals, stirring in between, until smooth and completely melted.
Coat the Oreos
Dip each Oreo into the melted chocolate, making sure to completely coat it. Use a fork to lift it out and let the excess chocolate drip off.
Add Toppings
While the chocolate is still wet, sprinkle your choice of toppings over each Oreo. Get creative – use colorful sprinkles or crushed nuts for a fun touch.
Set and Serve
Place the coated Oreos on a parchment-lined baking sheet. Let them sit at room temperature for about 10 minutes to set, or speed up the process by placing them in the refrigerator for 5 minutes.
After they’ve set, enjoy your delicious treats or package them up as gifts!
Pro Tips
- For a fun twist, try using different flavors of Oreos like mint or lemon. You can also experiment with white or dark chocolate for coating to create a unique flavor profile.
Serving Suggestions
These chocolate-covered Oreos make for a fantastic party treat. Consider arranging them on a decorative platter along with fresh strawberries or pink-themed candies to create a visually stunning spread. You can also package them in cellophane bags tied with a ribbon for delightful party favors that your guests will appreciate.
For a fun twist, serve them alongside a small plate of warm milk for dipping. This nostalgic pairing brings a comforting element to the treat and is sure to be a hit with both kids and adults. Feel free to get creative and add a themed card explaining your choice of toppings to personalize the experience further!
Troubleshooting Common Issues
If your chocolate coating isn’t smooth, it might be due to overheating. Always start with lower power settings on your microwave or avoid direct flames with your double boiler. If the chocolate has already seized, a small amount of coconut oil can save the day. Simply stir it in and gently reheat the mixture to bring it back to a silky consistency.
Another common issue is the chocolate not adhering to the Oreo. Ensure that you’re allowing the excess chocolate to drip off before placing the cookies on the baking sheet. If the chocolate is too thick, reheat it slightly and add a bit more coconut oil to improve its flow. This will help in achieving that beautiful, even coating you desire.
Questions About Recipes
→ Can I use any type of chocolate?
Yes, you can use dark, white, or even milk chocolate based on your preference!
→ How long do these treats last?
They can be stored in an airtight container at room temperature for up to one week.
→ Can I freeze these chocolate-covered Oreos?
Absolutely! Just place them in a single layer in a freezer-safe container, and they can last for up to three months.
→ What other toppings can I use?
You can use crushed candy canes, shredded coconut, or even edible glitter for a festive touch.
Valentines Treats Chocolate Covered Oreos
What You'll Need
Ingredients
- 12 Oreo cookies
- 1 cup semi-sweet chocolate chips
- 1 tablespoon coconut oil (optional)
- Sprinkles or crushed nuts for topping (optional)
How-To Steps
In a microwave-safe bowl, combine the semi-sweet chocolate chips with coconut oil. Microwave in 30-second intervals, stirring in between, until smooth and completely melted.
Dip each Oreo into the melted chocolate, making sure to completely coat it. Use a fork to lift it out and let the excess chocolate drip off.
While the chocolate is still wet, sprinkle your choice of toppings over each Oreo. Get creative – use colorful sprinkles or crushed nuts for a fun touch.
Place the coated Oreos on a parchment-lined baking sheet. Let them sit at room temperature for about 10 minutes to set, or speed up the process by placing them in the refrigerator for 5 minutes.
Extra Tips
- For a fun twist, try using different flavors of Oreos like mint or lemon. You can also experiment with white or dark chocolate for coating to create a unique flavor profile.
Nutritional Breakdown (Per Serving)
- Calories: 250 kcal
- Total Fat: 15g
- Saturated Fat: 8g
- Cholesterol: 0mg
- Sodium: 75mg
- Total Carbohydrates: 30g
- Dietary Fiber: 1g
- Sugars: 22g
- Protein: 2g